¶ API Key Authentication
When using API key authentication, the API service is providing an API key for each user – and the user is required to send the API key with each request. Usually this API key is sent in request headers and an exact way is described in the API service documentation.
Let's see, how you can set it up in RESTwithUS:
¶ Select RESTwithUS Authentication Method
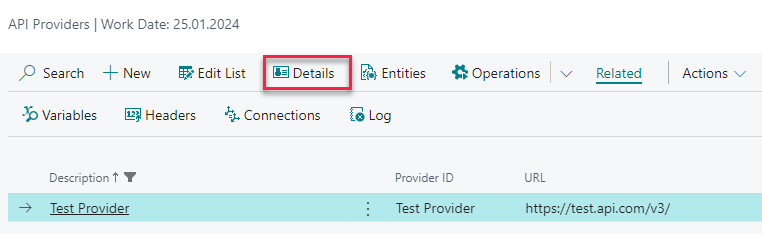
To set the provider for API key authentication, first select your API provider from the list and open Details:
Set the Authentication field in Login section to No Auth:

¶ (Optional) Save API Key in Provider Variables
This step is optional, but highly recommended. You can enter the API key value directly into provider headers (see next step), but since this is a sensitive information, it’s better to use provider variables.
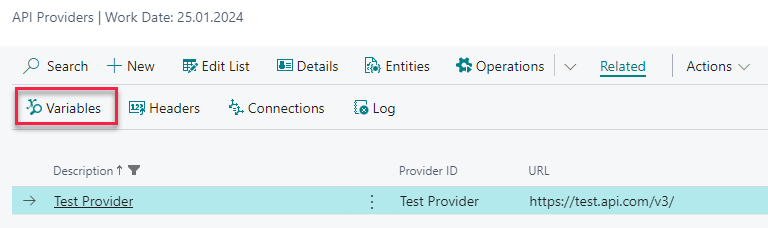
To set provider variables, select your API provider from the list and open Related / Variables:
Make a new line, name your variable, enter the API key value and check Hide Value checkbox:

- When Hide Value option is checked, variable value won’t be plainly visible in the page, plus it gets encrypted when exporting whole provider settings.
- If you are planning to transfer the provider settings into another environment (e.g. from test to a production server), you can check the Do not Overwrite Value option too. Variables with this setting are not transfered in the .rwu provider package and has to be set into each environment separately.
¶ Set Provider Headers
Let’s say your provider requires an API key and you need to send it with each request in the HTTP header called Api-Key. (Name of this header is usually different for each API service and you can find it in the provider documentation.)
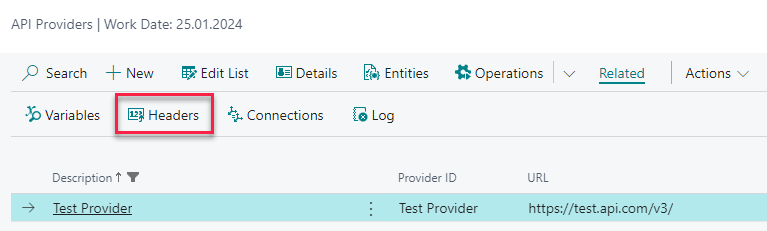
To set provider headers, select your API provider from the list and open Related / Headers:
Now, create the header for the API key and fill in its value:
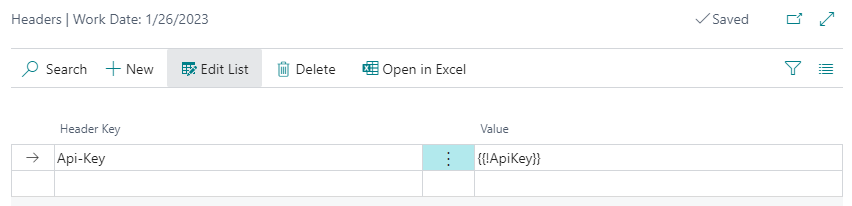
- Header Key – Name of the request HTTP header.
- Value – Value of the request header which in this case is the API key. You can fill in direct value here, but with sensitive information it’s better to use variables. You saved the API key value in the variable
ApiKeyduring the last step and you can now get the value using syntax{{ApiKey}}for an optional variable or{{!ApiKey}}for a required variable.
Tip: If a provider needs more than one header for authentication, just make a second line in provider headers. All headers in this list will be sent with each provider request.